Become a contributor!

This button doesn't work at all, but you're welcome to press it. And to contact me (Dustin), should you wish to become a contributor.

Tuesday, December 28, 2010

Apple Muffins

Ingredients (12-14 muffins)
1 apple
40g sugar*
★200g flour
★6g baking powder
★3g cinnamon (optional)
♡60g sugar*
♡2 eggs
♡100ml oil
♡20ml milk
*These quantities of sugar are based on a Japanese recipe, so you will probably be dissatisfied if you don't increase them.

  1. Peel and core the apple, and cut into small pieces about 5mm in thickness. Place in a bowl and cover with the 40g of sugar.
  2. In a separate bowl, whisk all of the ♡ ingredients.
  3. Add the apples to the bowl from Step 2, then sift in the ★ ingredients while mixing roughly and deeply (uhh lost in translation) with a rubber/silicone spatula.
  4. Fill the muffin cups to about half or two-thirds full, then bake at ~355 F for 15 minutes.

Saturday, December 11, 2010

Steamed fish and "clear cooked" vegetables

I felt like keeping it simple tonight, so I made the following simple dishes, and they seemed to work well:

Pseudo Cantonese steamed fish (because the real version is harder)
Fish (usually sea bass, though I used tilapia)
Scallions
Ginger
Soy sauce
A dash of sesame oil
Place all in bowl.  Steam until cooked.  (I had rice cooking and used the steamer above the cooker)

"Clear cooked" vegetables
Spinach (dou miao works too...)
Garlic
Fry up garlic until brown.  Throw in vegetables.  Add some water and cover.  Turn heat low and simmer until it's cooked to your taste.

Both really simple.  Both yummy!

Friday, December 3, 2010

Salvaging freezer burnt food?

Hi guys,

My mom insisted I take home Thanksgiving turkey/brussel sprouts/stuffing.  Naturally I wasn't keen on eating them right after Thanksgiving, so I put them in the freezer.  Unfortunately, they look badly freezer burnt.  Any suggestions on creative ways to salvage them?  I feel bad tossing out my mom's Thanksgiving food...

Thanks in advance!

Wednesday, November 10, 2010

Lemon "Tartar" Sauce

This is like a 2-minute recipe for a great sauce that goes especially well with white fish (baked):
mayonnaise
3tbsp
lemon juice
2tbsp
sugar
1tbsp
salt

pepper
olive oil

Mix everything together, and you're done! This serves about three. For those adverse to using 3 tbsp of mayonnaise (like me), you can substitute at least half of it with an equivalent amount of plain yogurt. I used Trader Joe's European Style Nonfat Plain Yogurt, which has a loose consistency ideal for a sauce.

Monday, November 8, 2010

Pear apple stew

This was very simple and delicious, so I thought I'd share.

Pear apple stew
1 pear
1 apple
1/4 cup of water
Spices: Crushed cloves, a generous helping of cinnamon, nutmeg, and a dash of ginger powder

Chop pears and apples.  Put spices.  Add water.  Bring water to a boil.  Lower the heat and simmer until fruits are of the desired softness.  Can be served hot or cold, though I had it hot.

I'm sure most people would add sugar and butter, but I found this to be sweet enough, and I don't think the butter would've been necessary.

Banana Chicken Curry

I had a lot of bananas that were going bad, and I didn't want to make banana bread.  My roommate had a jar of curry paste that was unused and, to use his words, "following [him] like an albatross."  So, I decided to make banana chicken curry. There are tons of recipes out there, but this is what I did:

Banana Chicken Curry
4 bananas, chopped
4 chicken thighs (breasts are fine, but I just felt like using thighs), chopped
1 onion
Garlic
Sweet peppers
4 tablespoons of mild curry paste
1/4 cup of water

Brown the garlic and onions; then throw in the chicken until browned.  Throw in the peppers and curry paste and add water.  Stir and cover.  When the curry is sauce-like (as opposed to lumpy), throw in the bananas and cook until it's of the desired consistency.

Some recipes include coconut milk or yogurt, but I didn't find them necessary; I think the yogurt would add a bit of sourness, though it would thicken the sauce.  The bananas add a sweetness which infuses the curry, which I kind of liked.  In summary, the interwebs are right, and this recipe does work.

Friday, November 5, 2010

Ketchup and Mayonnaise Broccoli?!

This may sound weird, and I do have to put in the disclaimer that this dish may play to an acquired taste for creative Japanese food. (Also, American mayonnaise is not that good, so that might throw this off.) But try it anyway! It's really good. :)

Ingredients
1 chicken thigh
1 head of broccoli
1/4 cabbage
1 large onion
2 tbsp ketchup
1 tbsp mayonnaise
salt
pepper

  1. Wash and cut broccoli, then boil for 3-5 minutes in slightly salted water. Wash and cut the cabbage (into convenient pieces) and onion (thinly), and cut and lightly salt-and-pepper the chicken.
  2. In a large pan, cook the chicken on medium heat until it is about half-cooked. Then add the cabbage and onion, and continue to cook on medium heat for another 2-3 minutes.
  3. When the vegetables begin to soften, add the broccoli and continue to cook for 1-2 minutes.
  4. Turn the heat down to low, then add about 100 mL of water to the pan. Add the ketchup, and return to medium heat and cook for 1 min. Then add the mayonnaise.
  5. Let the whole thing summer for 2-3 minutes, then serve.

Fallish Food


Recently, a friend of mine linked me to this recipe for apple and cheddar scones. Also, recently the grocery store down the street was selling bruised apples for really cheap. Clearly, it was meant to be! So I made scones. I always thought cheese and apples was sort of weird, but I guess it isn't. It's hard to tell though, because actually these scones need a lot more cheese than the recipe says--mostly they taste like apples. I also used somewhat sweeter apples than you're probably supposed to, so that might also be a contributing factor. Also they're kind of gooey? Usually my scone recipes have issues being too dry, but this one was super sticky, and the resulting scones are kind of over-moist. So, maybe add some flour or something. Also I don't know why they say it makes six scones--I made eight, and they were big, and they got HUGE in the oven, so pay no attention to that either. They are delicious, though.

The other thing I acquired recently is kale! It turns out that the school "farm" (=vegetable patch) has lots of kale, and it is free for the taking, and I think I may be one of the few people really excited about this. The Dutch eat kale! The Dutch eat kale with potatoes and sausage, in a dish called "stamppot". So, it is childhood memories. Not that I was really excited about the stuff then, but now it is nostalgia. Problem is that all the recipes I could find were sort of assuming you went and bought a nice package of kale at the greengrocers, so it was nicely measured in grams, and then you had several kilograms of potatoes, and none of it seemed very applicable to me so I just winged it and boiled up some potatoes to a mashable consistency. Then I drained them, lest I have too much water, and then added some sliced-up kale with what seemed like an appropriate amount of water for it to cook in, which turned out to be really stupid because the kale shrank and I had way to much water and my already-cooked potatoes were now disintegrating into a slurry and I was getting cream-of-kale soup and it was bad, and the potato/kale ratio was all wrong. So, don't do that! Probably it's best to cook the kale a few minutes first and then add it to the potatoes. Also I kept adding more and more bundles of kale to the mixture every time I reheated it, so the lesson is basically to have way more kale than you think you need--like a bundle of leaves for every potato you use. And to cook it first, or maybe cook it with the potatoes so you can drain out excess water before it's too late. And then spice with salt and pepper and nutmeg or whatever you have lying around. And if you do have too much water, oatmeal makes it all coagulate nicely, unless you REALLY have too much like I did and you get a kale porridge. Serve the result with red wine vinegar and some smoked sausage with mustard for a good cold-weather sort of meal.

Tuesday, November 2, 2010

Potato-Spinach Pancakes

Who doesn't like pancakes? =D I actually used swiss chard instead of spinach, and swiss chard has a better texture for this, but I figured that spinach would be a more commonly available ingredient. Anyway...


Ingredients
3 large potatoes
1 bundle(?) of spinach/swiss chard
3 tbsp flour
1/2 tsp salt
(2 tbsp shredded cheese)
  1. Wash then boil the spinach/swiss chard, then chop into small pieces. Both the leaves and the stalks can be used. Lightly squeeze out some of the water, and set aside.
  2. Wash and peel the potatoes, then grate into a medium-large bowl.
  3. Add the spinach/swiss chard to the bowl, along with the salt and flour. (The original recipe calls for the cheese to be added as well, but I actually skipped the cheese altogether and thought it tasted fine.) If the mixture is too watery, then adjust by adding more flour.
    The other option would be to remove some of the water that the potatoes generate before adding the rest of the ingredients, but this water contains a lot of useful starch, so this is not ideal.
  4. After everything is mixed in the bowl, shape them into small pancakes, and pan-fry with a small amount of olive oil until brown.

Monday, November 1, 2010

whole chickens and what to do with them!

Dustin has already mentioned the joys of making chicken stock but I will reiterate here and add my additions.

So first of all I managed to find two whole chickens packaged together in a bag for about 3 dollars. I bought them and froze them and didn't do anything with them for about a month.

This weekend I decided that I had a free afternoon so I got the biggest pot I had and one of the chickens (still frozen) and put it in the pot with some water. This is to thaw it enough to cut into pieces. After getting it nice and warm at least on the outside I pulled it out of the pot and cut it up into the classic anatomical chicken pieces. These went back in the pot along with an onion some dried chillis and other sundries (a bayleaf or two would be ideal here but I don't have any). Now you bring this to a boil and let it simmer for hours and hours hours. When it's tasty it's done. Now strain into bowl and put the chicken bits aside to cool. The stock can then be put into an appropriate container for refrigerating. (There will be lots of fat on top the next morning. If you care, lift it off and throw it away). Once the chicken pieces are cool pick all the meat off with your hands (only way) and reserve this too. Throw out the onion and other flavour agents you used. Their work is done.

If you want to actually make chicken soup the stock and the meat bits go back into your pot with the veggies etc. in your soup.

I didn't want to make soup. SO I made enchiladas. You can do many other mexican inspired things that use already cooked chicken.

Here is how I made enchiladas using Joy of Cooking like instructions with the ingredients interspersed:

Sauce: Dice finely Onion, garlic, dried chilli (a mexican kind preferably). This is a job for a food processor if you have one. Now fry this mixture in oil until aromatic. At this point add a four ounce can of tomato paste and about a cup and a half of chicken stock. Add a few teaspoons of dry oregano and a short teaspoon of cumin. Stir it all up and bring to a boil letting it reduce to a slightly thick consistency (but make sure you still have a fair amount of sauce).

Now for the fun part. Take that cooked chicken and grate a little cheese into it. Pour enough sauce in to evenly incorporate. Now take a brownie pan and corn tortillas, estimate how many enchiladas will fit into your pan (probably about 8, not the whole package but oh well). Dip each tortilla in the sauce, spoon in the filling and fold it over (into an enchilada like shape), putting it in the pan. Repeat until the pan is full. Pour the remaining sauce over the top and grate cheese over that generously. Bake in the oven until bubbly.

Sunday, October 31, 2010

Funky rice cooker bread pudding

I had whole wheat, multi-grain bread from last week that I put in a sealed tupperware in hopes of slowing down its descent to staleness.  It didn't dry out, but it definitely got stale.  So, I made rice cooker bread pudding.  That's not the funky part, though--I don't have milk and was too lazy to get some, so I used yogurt.

Funky rice cooker bread pudding
Old bread (equivalent to 2-3 cups)
1 cup of yogurt
2 eggs
1 teaspoon of vanilla extract
Cinnamon, nutmeg, a dash of crushed cloves and ginger
1/2 cup of hot water
Walnuts
Raisins
Sugar

Break bread into little pieces and put into rice cooker.  Mix in spices, raisins, and walnuts.  Beat eggs and put into bread mix; might as well add in yogurt, too.  Stir.  At this point I noticed the mix seemed a bit dry, so I boiled some water and put 1/2 cup of it in.  Add vanilla extract and sugar.  Cover.

My rice cooker is primitive, so it kept stopping the cooking process and switching to the warm setting.  It'll be done when, after sticking in a fork/chopstick, the fork/chopstick comes out pretty clean.

Serve with ice cream or honey.

The ingredient quantities might need some tinkering--I think I could've added more vanilla extract, but all in all, it seemed to work out ok.  It's pretty healthy (no butter/oil, if you'll notice); all I'd note in tinkering the ingredient quantities is to beware of the sourness of the yogurt.

Saturday, October 30, 2010

Crazy congee with chicken stock and fish

I made a very non-traditional congee/jook (粥) last week that I'd like to share.  It was a multi-step process.

I wanted to make a fish congee (魚片粥).  The usual way of making congee is to use the following water:rice ratios:

  • 8:1 for thick congee
  • 10:1 for medium-thick congee
  • 13:1 for super thin congee

But I had leftover chicken bones and skin (courtesy of a roommate of mine) that had been sitting around for awhile.  I couldn't make Cantonese chicken soup (not enough ingredients), so I figured I'd use it to make a simple chicken stock.

Chicken stock
Leftover bones and skin
Shitake mushrooms--mine were dried, so I soaked them until they were soft-ish.
Ginger
~8 cups of water
Threw all ingredients into a slow cooker and cooked on high for about 12 hours.  Check on it every so often to spoon out the gunk (fat, mostly).  This is done by taking spoonfuls from the surface and blowing across the top over a sink.

Afterwards, I was ready to make the congee.  By the time the stock was done, it was about midnight (I started late).  If I cooked the congee in a rice cooker, I'm guessing I would have needed to stay up to make sure the congee wouldn't overcook.  I wasn't keen on doing that, so I stuck with the slow cooker.

Crazy Congee
1 cup of brown rice (I forgot I only had brown rice, which requires more water.  So, I threw in...)
1 more cup of water
Edamame beans (normally, people would throw in something like bok choy)
Dried beancurd

For the fish: Marinate slices of fish in a touch of soy sauce, sesame oil, and ginger.

Dump everything into the slow cooker and chicken stock; it's done when all the grains are broken.  Sprinkle scallions when ready to serve.

My hand slipped and I poured too much soy sauce, so I didn't let the fish marinate too long.  Unfortunately, I probably should've left it in longer--it was a bit fishy :S  That said, the scallions saved the day!  I also threw in peanuts, even, which gave it a bit of a sampan porridge feel.

The consistency was exactly what I was shooting for--thick and with the rice grains broken down.  I left the slow cooker on high so it would be ready in the morning, which it indeed was.  It's lasted me for about a week now.  Happiness!

Advice for next time:
Use a rice cooker instead of a slow cooker for the congee, and maybe even for the chicken stock--it might cook a bit faster!  Also add gingko nuts.

Sunday, October 17, 2010

Green tea frozen yogurt--suggestions?

Hi boys and girls,

As many of you know, I was in Asia last summer and I miss it very much.  I miss the yummy (and cheap food), and the funky desserts.  Mostly I really want green tea and sesame ice cream (not together!) but I'm thinking more along the lines of frozen yogurt.

I came across this recipe here for green tea froyo and plan on doing without the vanilla, but there are some problems:
  • I do not have an ice cream maker
  • I only have green tea bags
  • I do not know what "fold in" means
To make matters more confusing, I found this factoid:
The casein in cow's milk is thought to inactivate the healthy catechins in green tea. For this reason, it's best to use non dairy milk such as soy, almond, oat, or rice milk when making these products. Start by adding a teaspoonful of matcha green tea powder to a pint of nondairy milk. The matcha green tea powder doesn't dissolve when the milk is cold. Heat the milk green tea powder combination in your microwave for two minutes and stir thoroughly to dissolve the powder. You may need to put it back in the microwave for an additional minute to get the powder to completely dissolve. Add more matcha powder and sweetener to taste, if necessary. To make green tea yogurt, add a teaspoon of matcha powder to a cup of vanilla yogurt and mix thoroughly. Again, soy based yogurt is best since it lacks casein. 
(source: eHow)

Any suggestions, insights, or willing experimenters?

Also, do you think mango and walnuts would go well with this, and in blended or chunky form?  I don't have a blender but I could always try smashing them by hand.

And anybody have any ideas for sesame froyo?  I don't want just sesame chunks--I'm interested in actual sesame flavor--but bear in mind that I don't have a blender...

If either of these pan out I'd consider other interesting desserts.  I just went to Toscanini's with a friend and got goat cheese-brownie ice cream and bourbon ice cream.  It was delicious, but overpriced.

Thanks!

Tomato-beef-rice

At long last, one of my Cantonese/HK recipes that I made awhile back.  To be honest I think this is a HK dish, but I grew up eating it in Cantonese joints, so what the heck...

Tomatoes and Beef With Rice (番茄牛肉飯)
Tomatoes
Beef (I didn't have any, so I used chicken--it still works)
Soy sauce
Cornstarch
Ginger
Scallions
Garlic (optional)
Onion (optional)
Sugar (optional)
Scrambled eggs (optional)
A touch of worcestershire sauce (optional)
Fermented black beans (optional)

Marinate beef in soy sauce and corn starch; sprinkle sugar if desired.  Cook tomatoes first with ginger, garlic,  onions, and scrambled eggs (if you have those); add cornstarch if you like the sauce thicker.  Add beef and cook until to satisfaction.  Throw in scallions last and serve with rice.

Really simple, really yummy :)

I didn't have a camera, but this is what it's supposed to look like:

Wednesday, October 13, 2010

szechuan adventures

Some of you may know about ma la, the numbing feeling that you get from really spicy chinese food. This is a bit of an acquired taste and can be off putting to the relative newcomer to spicy food.

The story: I decided that it would be fun to make real ma po tofu from this recipe. I replaced the hot blackbean with regular blackbean mixed with chilli paste. I also toned down the chili oil and used cayenne instead of real asian chilli powder (assuming that this would be a little less spicy).

It turned out to be pretty much exactly what I was expecting it to be from the times I've had authentic versions of this dish. This turned out to be a bit too much for the uninitiated person I fed it too.

Meatloaf

Meatloaf is a great way to make a meat dish that you can keep in the fridge and munch on for lunches.

Here is a slightly unorthodox method for making it that I learned from my mother.

Take a pound of ground beef (try to get relatively lean beef if possible). Add two or three hot italian sausages and an egg. Squish it all together with your hands--the only way to do this!

Add oatmeal (this serves as a high fiber replacement for bread-crumbs). Squish it in.

Add half an onion, black pepper, and various herbs that strike your fancy like oregano and sage.

Also add a few spoons of sour cream (a special touch from Anna de Bakker's family).

Finish squishing. It should hold together pretty well. Shape into a loaf and put in a brownie pan.

Bake for about half an hour in a 350°F oven. It should be firm and with relatively clear juices.

Serve either warm or cold.

Wednesday, October 6, 2010

Scallop, Mushroom, and Onion Pasta


Seafood and (pasta) sauces seem to be a recurring theme here, so I'll add another recipe for good measure. This recipe was developed by a Japanese man who works full-time, so it's pretty basic but still very good.
1 small onion
mushrooms (any kind, and as much as you want)
4-5 large frozen scallops (obviously they don't have to be frozen, and you can use more)
olive oil
pasta
garlic (either chopped or in paste form)
salt
pepper

See? Already the lack of actual measurements in the ingredients points to how easy this recipe is.

Getting the timing of the steps in this recipe just right in order to maximize time and energy efficiency can be a little tricky since there are variations on how long the particular pasta you have takes to cook or how fast you can prepare the other ingredients, but here is my interpretation on how things should be done:
  1. Remove scallops from the freezer. To help with defrosting quickly rinse them and leave them out.
  2. Slice the onion and mushrooms thinly, and set aside.
  3. Cook the pasta according to the directions on the package, but cut the cooking time short by 1-2 minutes.
  4. While the pasta is cooking, heat a small amount of olive oil in a pan and cook the garlic until aromatic (that is a term outside of chemistry, right? I'm very serious about this question.) on low heat. Then add the onions and mushrooms, and cook on medium heat until the onion turns translucent.
  5. When the pasta is done, add two ladlefuls of the pasta water (?) to the pan, add the scallops, and continue to cook.
  6. After the scallops are just about cooked, mix the pasta and onions/mushrooms/scallops together, and cook briefly on high heat. Add salt and pepper to taste.

Sunday, October 3, 2010

Peanut Sauce

I had a bunch of extra coconut milk from making the challenge so I decided that a good thing to do with it is to make peanut sauce. This is super easy and delicious. I made lots and lots of it this summer when I was too overheated (and too temporarily situated) to go buy lots of ingredients and all I had was vinegar, soy sauce and sriracha for seasoning things.

The basic version (all measurements are approximate, it won't matter really) :

Peanut butter: about 2, 3 heaping spoons.
Sriracha sauce (to taste)
Soy sauce (about a teaspoon)
vinegar or tamarind liquid (a few teaspoons) If you know how to deal with tamarind it is totally the way to go.
about cup of water or coconut milk. It's totally fine with water. The coconut milk version is probably too rich to use as say a pasta sauce.

Stir this up in a saucepan. It will look gross and terrible. Don't worry. When the peanut butter is more or less in suspension (there shouldn't be any huge chunks in the bottom of the pan), but it on the stove and bring to a boil. This is the tricky bit. For a while it will bubble normally, but then it will start to thicken and the bubbles will rise in the pan. When this happens be ready to take it off the heat very quickly because soon it will start spattering like a mud pot at Yellowstone. You should preferably have it off the heat right before it starts doing this. It is now done!

Put it on anything you think it will be nice on. The most recent batch I made found its way onto some poached chicken and cucumber slices.

The other dish on the plate was my rendition of the cooking challenge.

Saturday, October 2, 2010

Salt-and-Butter Salmon & Potatoes

As long as we're talking about fish, here's an easy recipe for salmon:
(Serves 4)
3 cuts of salmon
2 medium potatoes
1 tbsp butter
100 ml water
salt
pepper
  1. After cleaning the salmon, sprinkle both sides thoroughly with salt and pepper, and let sit for 15 minutes.
    Instead of fresh salmon, I actually used leftover smoked salmon, which still turned out perfectly fine and allowed me to skip this step altogether.
  2. Cut the potatoes into sixths (or eighths, if your potatoes are large), and let sit in a bowl of water for 15 minutes.
  3. Fry (pan-fry?) the salmon in butter (margarine), then add the potatoes, making sure to allow the butter to coat everything.
    Using smoked salmon makes the first part of this step pretty minimal.
  4. Add the 100 ml of water and let cook for 10-15 minutes (lid on) until the potatoes are soft and the water is essentially gone.
  5. If necessary, add more salt and pepper to taste.
This is a fast and easy way to prepare salmon, and using smoked salmon not only makes everything even easier but almost eliminates the need to add any salt.

What I cooked in Berlin

While visiting Dustin, we had dinner with friends. I made a Peanut Soup, Dustin made dessert. Perhaps you'll enjoy the soup.

Peanut Soup, Senegalese Style

3/4 roasted and shelled peanuts
2 tablespoons peanut or neutral oil
1 medium red onion, halved and thinly sliced
1 tablespoon peeled and minced fresh ginger
1 tablespooon minced garlic
pinch cayenne
salt and pepper
6 cups vegetable stock
2 sweet potatoes or yams, peeled and cut into thick slices
8 to 12 plum potatoes, cored and halved (canned without their liquid ok too)
1/2 pounds collards or kale, cut into wide ribbons
1/4 cup chunky peanut butter

  • Break the peanuts into large pieces
  • Put the oil in a pan over medium high heat. When hot, add onions, garlic, ginger. Cook, stirring until soft, 3-5 minutes.
  • Add 1/2 cup of peanuts and the cayenne, salt, pepper. Stir in the sock and sweet potatoes, bring to a boil, and turn the heat down to medium low so the soup bubbles gently. Partially cover and cook, stirring occasionally, until potatoes are tender, about 10 minutes.
  • Stir in tomatoes, collards, and peanut butter. Cover and cook until collards are tender, 5-8 minutes. Garnish with remaining peanuts.
Note: You can also serve this with millet for a more substantial meal.

Quick and simple way to cook fish!

I am generally not a fan of seafood, but the one thing I do eat is fish. So I've been trying to come up with ways to cook different types of fish. But, since I have no oven (a very unfortunate thing that I keep complaining about, since it seems like every good recipe I find requires an oven), I'm basically limited to cooking things on the stove (or the microwave), so I can't try baking the fish. But I've realized that I like frying fish, because it is so easy and quick. I've only tried this on two types of fish so far -- salmon and sea bream -- but it's turned out delicious both times.

Ingredients:
fish filet
lemon
herbs
oil, salt & pepper

1. Heat up oil in skillet.
2. Lay down fish filet (skin-side down).
3. Squeeze lemon juice over it. (TIP: Lemons last for a pretty long time in the fridge. To make a lemon easier to squeeze, microwave it for 15-20 seconds first so that it's warm-ish, and roll on the table a bit.)
4. Sprinkle some fresh or dry herbs (I recommend rosemary or dill, or (my favorite) Herbes de Provence mix -- which usually includes rosemary, sage, thyme, basil, lavender, etc). If you use fresh, it's probably better to sprinkle them right before you eat instead of while frying.
5. Sprinkle with salt and pepper.
6. Let it fry on that side for 5-7 minutes, depending on how thick the piece of fish is. (The skin side should start to get brownish).
7. Turn fish over, repeat sprinkling with the lemon juice, herbs, and salt, and fry another 4-5 minutes, or as long as you need for it to cook through completely.

That's it! Takes about 15 minutes since you need no preparation at all, and tastes great. I like to serve it with potatoes or rice or green beans. As I said, don't know if this works well with any type of fish, but try it!

Friday, October 1, 2010

Mission Impossible

I'm finally going to be moving to my new apartment this weekend, which brings with it a new set of cooking challenges: I have a vegan roommate, and so our kitchen is vegan. In general, this works well for me since I'm allergic to milk, fish, and (mildly) eggs. However, I still haven't tried baking without eggs, aside from the things (like most pies) that don't have any eggs in them to begin with.

Your mission, should you choose to accept it, is to discover or invent a recipe for vegan lemon-meringue pie. I understand that this may seem like an oxymoron, and it probably is. But lemon-meringue pie is one of my favorite desserts, but, unfortunately, one that my steadily worsening allergy to eggs has made it impossible (or at least really unpleasant) to eat.

I'll probably try some experiments to this end as well, but at this point I have no idea even where to begin. I look forward to your suggestions.

Toaster-Oven Cookies

On a day I would now very much like to forget, it was discovered that I do not know how to cook in English or in US customary units. This is of no particular concern to my mother, who believes that a very good reason for my learning how to cook is to avoid becoming American, but this does present some challenges to cooking and writing blog posts accessibly.

A challenge of cooking in general, furthermore, is not having all of the necessary materials. It is often said that all of the required ingredients should be assembled before starting on a recipe, but I have realized that it is equally important to have all of the listed equipment. I made cookies from scratch last night, and the recipe calls for a kitchen scale, food processor, rolling pin, and cookie cutters, none of which I own in my incomplete studio kitchen.

The recipe is as follows:
50g peanut powder
20g chopped peanuts
100g flour
2 tbsp sugar
2 tbsp butter
3 tbsp milk or water
  1. (Optional) Roast peanuts in a toaster oven for several minutes to give the cookies a more savory taste.

    I actually didn't have peanuts, so I substituted with Unsalted & Dry Roasted Almonds (Sliced and Slivered) from Trader Joe's. Since they were already roasted, I skipped this step.
  2. Chop enough peanuts (almonds) in a food processor to obtain 50g of peanut powder. Also chop 20g of peanuts (almonds) for several seconds.

    Thankfully, the bag of almonds indicated that 30g was equal to 1/4 cup, which allowed me to get around the issue of not having a kitchen scale. In hindsight this method was not altogether accurate, since the bulk of unpowdered and powdered nuts are different and I didn't notice the gram-cup conversion until after I started chopping, but I don't think it matters all that much. As for the chopping itself, I did it by hand, which is not all that fun and results in a somewhat coarse powder.

    Just getting started.
  3. Mix the 50g of peanut (almond) powder, shaken (?) flour, sugar, butter, and milk/water in a bowl. After these ingredients have been kneaded together, add the 20g of peanuts (almonds) and mix. Let the dough sleep (sit?) for 30 minutes. If the dough is too dry or crumbly, add more milk/water.

    I used margarine instead of butter. I also actually added 4 tbsp of sugar here instead of 2 tbsp, because the recipe indicated that the cookies made with 2 tbsp would be barely sweet. The suggestions were to add marmalade (à la scones), honey, or extra sugar, and I went with the extra sugar because I do not have marmalade or honey. 4 tbsp, though, is still probably not sweet enough for most of you. For reference, 200 ml of flour is supposed to be equivalent to 105 g.
  4. Roll out the dough to about 7-8 mm in thickness, and cut with cookie cutters.

    I know that a simple alternative to a rolling pin is a glass, but remarkably I do not have a single one in this apartment. (I do drink things, it's just that I only have mugs.) And so I basically pounded out the dough with my palms to the right thickness, although this isn't particularly recommended because the coarse peanut/almond bits can be a little painful. A glass would also have been helpful as a makeshift cookie cutter, but in true Japanese fashion I replaced that with the bottom rim of a rice bowl. Harhar. This resulted in 38.5 small (~3 cm in diameter) cookies.

    In case you were wondering.
  5. Bake the cookies in a 300-watt toaster oven until the cookies become golden brown, then cool on a wire rack.

    This took about 15-20 minutes of baking, but my toaster oven was too small to accommodate all 38.5 cookies at once, so I had to split it into two rounds. Some of the cookies came out a little harder than the recipe suggested, which leads me to wonder whether the margarine-butter substitution was a bad idea, if I didn't have enough liquid, or what.


The last step was the reason I was initially drawn to this recipe--I do have an oven, but it's not very efficient to heat it for a small batch of cookies, and the baking tray I have is not oven-sized. A toaster oven is really easy to use and the cleanup is minimal.

By the way, this is the original recipe, even though in all likelihood it will not help you: http://cookpad.com/recipe/914586

Tags!

This blog is growing, and I worry that it may soon become unmanageable. I was thinking about adding tags, but I don't know which ones to add. Perhaps "dessert" and "pasta" and "sauce." And then One-Haw already tagged some posts with "Cantonese," which I think is a good idea. Anyway, suggest some tags in the comments!

Thursday, September 30, 2010

The first challenge!

Hello everyone!

I hereby announce the first ever This Blog Cooking Challenge! The name of the challenge is Coconut-Braised Beef. The link to the recipe is on the right sidebar. So start cooking!

Here are the rules for completing the challenge:

  • You must prepare the meal and send me a short synopsis of the challenges you faced and how you overcame them. Also you should rate the dish on a 1-10 scale.
  • The deadline is one week from the time of posting.
Here are some guidelines for completing the challenge:

  • Try to feed this food to other people. In this way, you can bribe them to be friends with you.
  • Take pictures if you can, at various points in the cooking process.
  • Try not to be a vegetarian, because then you cannot eat the food (in this particular challenge).
After the challenge is over, I will prepare a post with your synopses and photos. It will probably be epic.

I picked this recipe because I have never cooked beef before, and I'm scared of it. Jeremy Lin (the classicist/linguist, not the basketball player) sent it to me. He recommends using less lime juice, and more pepper. Thanks, Jeremy!

Things to put on pasta!

My most recent cooking exploits have focused on making sauce-like substances to put on the cheap and delicious ravioli I recently bought at Trader Joes (sorry for all of you who are living in Europe and unable to use this resource).

I decided that a good thing to do would be to take some Italian sausage and cook it up with onions and garlic and mushrooms. This worked very nicely. As a variation in order to use up the rest of the sausage I put some green pepper and fresh tomato in as well to make it more resemble a conventional pasta sauce. I used a random pepper that wasn't a bell pepper since I don't like bell peppers.

I guess some preparation directives are probably in order here:
Start by putting the sausages (removed from their skins) in a largish frying pan no cooking oil is necessary. Break up the meat with your stirring implement. Once there is enough grease in the pan to be getting on with put in onions and garlic and green pepper (half an onion and a clove or two are enough to go with 2 sausages). Don't worry about things sticking to the bottom of the pan. Once things look slightly golden brown around the edges, pour a little water into the pan and scrape up the stuck bits, boil out the water and add mushrooms. You might want to do the deglazing ritual again. Add your tomatoes (peeled if you don't like random bits of tomato skin in your sauce) and let them cook down and make this creation more or less sauce-like. Solid pieces of tomato are fine though.

The most important part is addition of herbs and spices though. While you are frying add various herbs from the obvious (basil, oregano, black pepper) to the less (thyme and sage). Make sure to put some red pepper flakes or cayenne or something like that in too (if you like things to be slightly spicy).

You can make this is quantity and keep it around for all your pasta sauce needs.

Wednesday, September 29, 2010

Scallion pancake-lettes

Sorry, guys, I'm on a roll.  I swear I'll stop soon (though I owe you my variations of the Hong Kong pork chop fried rice and Cantonese tomato beef rice recipes; future plans are for dan dan mian and tzar jang mian).  If you ever crave scallion pancakes but are tight on time, here's a quick fix.

Scallion pancake-lettes
Flour
Water
Scallions (frozen or fresh are fine)
Egg (optional)
Salt as needed (some prefer unsalted)
Mix them all and fry them up.

But wait!

Real scallion pancakes require special rolling techniques and whatnot and are time consuming and not easy to get right.  This recipe is a lot easier.  The hard part about this recipe is getting the proportions of flour and water right.  So here's the key: Take a chopstick and dip it into the mix.  If the mix drips off from the chopstick in solid droplets (i.e. not sluggishly dripping down or racing down like water), your mix is right.


As an aside, I've also made sweet versions of this--instead of adding salt and scallions, I add in honey or mashed bananas/apples.

2 simple and easy snacks

Since I usually just cook for myself, I tend towards cooking simply--I try not to spend more than 30 minutes cooking and cleaning, which I realize probably isn't what all of you have in mind.  Here are two quick snacks that are good for any time of the day which I made for myself recently.

French Cheese Toast: It's a combination of French toast and the grilled cheese sandwich.  Take stale bread, pop in some cheese in between a few of the pieces (hence, it's easier if the bread's in small pieces, so the cheese will stay in), place the sandwiches into beaten eggs, and fry them up.

Pears, brie, walnuts: Well, it's kind of obvious what this is :)  Had it with a glass of white.  Best if you toast the pears, brie and walnuts; if you don't have a toaster, use a microwave.

My (Healthy) Variation of Steamed Pork and Salted Egg

For those of you who know your Cantonese food (::looks around and realizes it's me::), you may have encountered the steamed pork and salted egg dish.  I loved it as a child when we used to go to Mandarin Court, one of the best Cantonese restaurants in NYC, until I realized that it's a bit on the heavy side--the fat parts of minced pork + salted duck yolk = lots of calories.

But I encountered a recipe here and varied it up a bit, and it turned out to work quite well.  Here are the healthy variations:

  • Use ground chicken or ground turkey (the latter is a bit sweeter)
  • Use one egg--instead of beating the egg, just use the egg white.  Keep that yolk, and use that as the salted egg yolk on top of the pork (and actually salt the yolk).  Make sure the yolk doesn't break; otherwise it spreads over the surface of the meat and looks less pretty.
If you don't have rice wine, sherry can do; I haven't tried rice vinegar, but I imagine it should be fine.

Other things you can add:
  • Cut some shiitake mushrooms and throw it into the mix prior to steaming
  • Add scallions to the mix
  • Add dried shrimp (info here) into the mix
  • On top of the mix: Cut some small pieces of ginger to give it a tiny kick
It's a very low-maintenance dish--as it steams, you can do other things.  In particular, if you've a rice cooker, you can cook rice on the bottom and steam the meat on the top.  

Sure, it's not as fatty-tasting as the original, but it worked for me!

Tuesday, September 28, 2010

today's spice: tarragon!

Guys, until recently, I had no idea what tarragon was, other than some kind of herb. Then more recently I learned it can make a sort of interesting vinegar, but it still seemed sort of strange and obscure. One of those spices that's in your spice rack (or rather, your mother's spice rack; I have no spice rack) for completeness but you've never seen it used. Who wants one of them high-falutin' herbs anyway?
Friends, I have been converted. Tarragon is amazing. Principally, it is another way to Make Chicken Delicious. I made chicken salad today with tarragon and it was so. good. And I threw some tarragon in my tuna salad yesterday and it was also super delicious. It might be good in a salad dressing too, but I don't know because I have no vegetables. But basically, tarragon is really good. Hooray!
[The chicken salad recipe isn't super practical, unless, like me, you happen to have a hunk of gorgonzola in your fridge that needs to get eaten, and also a bunch of grapes. But it you have those things, you can add them into a basic chicken salad made by poaching yourself some chicken and cutting it into bits and adding mayo and sour cream. Which you also have, because you love sour cream. And add the tarragon!]

Monday, September 27, 2010

As American as Dutch apple pie

Things you didn't know about Germany #059:

They don't have pie. 

Things you didn't know about Germany #182 (irrelevant, but interesting):

German chocolate cake is not from Germany, but rather from an English guy named Sam German. 

Things you didn't know about Germany #059 (revised):

They didn't have pie, until I created pie.

Pie. I created pie.

Guys, it turns out pie isn't actually that difficult to make! I managed to make delicious Dutch apple pie even while overcoming the following challenges:
  • Germans don't have pie pans.
  • Germans don't have brown sugar.
  • My recipe was all Fahrenheity (not a huge challenge, but inconvenient). 
  • I am a man, and thus my brain is wired for eating pie rather than creating it.
I know you guys can find recipes for pie crust and apple pie all over the internet, so I'm going to offer some pro-tips for creating a pie without flaws.

Crust (double):
  • Substituting 1/2 cup of hazelnuts for 1/2 cup of flour is an excellent idea.
  • Refrigerating the crust before rolling it is absolutely necessary.
  • Rolling between two sheets of wax paper minimises the need for flour (does anyone else hate the texture of flour? Seriously, it makes my skin crawl.)
  • If you use a real pie pan, it has a lip on the edge for your crust to rest on. If you don't have such a pan, there is no such lip, and your crust will look bad at the edges. It will also drop down into the oven, unless you have a cookie sheet under your pie pan.
Filling: 
  • Big pieces of apple are really good in pie, but giant pieces of apple make your top crust really really uneven. The high parts get a little burned. Don't make giant pieces of apple.
  • Cut up 2 T of butter into tiny pieces and put it on top of your apples before adding the top crust. 
  • Dark brown sugar is tastier. I had to bring brown sugar all the way from America.
  • If you pour 1/2 cup of cream into the centre after about 30 minutes of baking, you have Dutch apple pie. 

I think Jill enjoyed the pie. The pieces held together better after the pie cooled.


Photo credits Halyna Mishchanyn, who also enjoyed the pie.

Sunday, September 26, 2010

speaking of red spice--chili powder and chili

Guys, I keep posting, but that is because it is weekend and so I cook things and then I like describing what I ate.
So yesterday I was at the Chinese market, and they have super cheap cans of spices! Except they only have spices you might want for Asian cooking, so it's not the most comprehensive. I picked up a bottle of red pepper powder, not sure what it was but thinking it would be spicy. And it was! I don't know what variety of pepper they use in Asian cooking, but it has Pep. So I used it to make chili powder (usually you use paprika or cayenne). This is done by mixing two parts pepper, one part cumin, one part oregano. And then maybe some extra cumin. And then hey, I have nutmeg, let's put in nutmeg, and black pepper, and garlic salt, and cloves because why not. And look! Chili powder! Now the obvious thing to do is to make chili.
Here are good things about chili: it freezes well (and frozen things are convenient, as per my previous post); it can be served with sour cream (delicious); and I didn't have to go out of the house for any of the ingredients, which was nice because I am lazy. One thing that is not so good about chili is it takes a while and gets your kitchen very steamy. But this is ok, because I had nothing better to do (except homework.)
Here is what I used for my chili:
1/2 cup dry black beans
1/2 cup dry navy beans
1 cup kidney beans
1 can (big) diced tomatoes
1 can (teeny) tomato paste
2 onions
6 cloves of garlic
2 Tbsp chili powder (above)
1 Tbsp cumin
1 tsp salt

Basically you mix it in a pot! The beans are the part that take a while: basically you have to boil them in water for two minutes and then let them sit covered (removed from heat) for an hour, and then drain and rinse. This apparently starts the germination process in the bean and gets rid of all the complex sugars that makes beans hard to digest! SCIENCE. And then you have to pour water in again and cook them for another hour or so until they are tender. This whole process could be skipped if you used cooked beans; however dry beans are cheaper by volume, and since they're shrivelled up you get more food per volume anyway, and they also keep with no preservatives! Yay beans.
Anyway once your beans are cooked you add your onions and garlic and spices (which you've been sauteeing). And the tomatoes. The tomato paste is mostly because you are impatient and want the sauce to thicken without boiling it down forever.
Also you could really use any dry beans you like, and you could add chili peppers or green peppers or any vegetables you might have. I have no vegetables. Also I saw a recipe that put a cup of beer in it, and that seems good too, but alas I have no beer. And some people do chocolate, apparently. And you could make meat chili too, but I lack meat as well.

IN CONCLUSION chili is a good thing to make when you have a lot of time and you have a lot of non-perishable food items. And you wish not to go to the store, and to have leftovers.

Menu planning

So here we are, it's Sunday, and I don't have any food in my house. This seems to happen every Sunday. In Europe, all grocery stores are closed on Sundays. So I generally suffer a hungry Sunday.

I need a Sunday-food. This food would be made of ingredients that I would be sure to have lying around my house. And it would need to be delicious. But it would not necessarily have to be fast to make. In fact, I would rather have it be labour/time intensive. On Sundays, one has time to enjoy one's kitchen. And I intend to enjoy my kitchen.

So I'm taking suggestions.

Saturday, September 25, 2010

garlic-honey-mustard sauce

Remember red-spice chicken, everyone? I don't actually, because I avoided it as much as I possibly could. Point is, HUDS did not do delicious chicken, and then they tried to hide it in a sauce. In real life, though, chicken can be truly delicious, because you can make it tender and not cardboard-flavoured. However, sauce is still a wondrous thing, especially if the meat in your life is almost entirely chicken (because it is cheap) and so you want variety. And spice is the variety of life. So here is an easy thing my friend mentioned the other day:
6 cloves garlic
2 Tbsp hot brown mustard
2 Tbsp honey
all roasted together, and then spread on whatever you want. However, thanks to the wonders of AT&T, I didn't have internet yesterday between basically any time range in which I might want dinner, so I couldn't see his exact proportions. I did I Tbsp of honey and 4 tsp of mustard and then thinned it out with olive oil, and that turned out very delicious also. As an added bonus you get all this nice hot honey stuck in your pan that you can burn your fingers on because you want to partake of its deliciousness.
So anyway that is something that is easy and makes good food.

Cake Caroline


Dear Dustin, Jeremies, Anna, et al:

This cake is very yum and also easy. I made it for my dad's birthday last week, and people ate it.

(technically called) Orange Cake
½ cup butter
1 cup brown sugar
1 egg
1 tsp baking soda
¼ tsp salt
1 ½ cup flour
½ cup buttermilk
½ cup orange juice
1 tsp grated orange rind
1 tsp vanilla
1. Preheat oven to 350 deg.
2. Cream together butter and brown sugar in mixer until smooth. Add egg and beat well.
3. Sift dry ingredients together.
4. Combine buttermilk, juice, rind and vanilla in a bowl.
5. Alternately add portions of dry and liquid ingredients to the butter mixture, mixing well.
6. Pour batter into buttered 9” x 13” pan. Bake for 20-25 minutes, until springy when touched, and edges are starting to turn golden brown.
7. Frost while still warm.
Frosting:
1 cup powdered sugar
1 tsp grated orange rind
2 Tbsp butter, melted
Orange juice
Mix sugar, rind and melted butter. Add orange juice just to moisten, until frosting is a spreadable consistency.

Thursday, September 23, 2010

Pierogies!


Guys, I really like pierogies. They are probably among the first things I learned to cook--you can get them frozen at the local Safeway, dunk in a pot of boiling water, take them out when they start floating, and eat with some sour cream. (I also love sour cream). Easy. Fast. Very good for when you are on-the-go to choir practice, or you just want to put delicious food in your stomach soon because you are hungry and lazy.
The problem: while Winnipeg is famous for its delicious cheesy potato dumplings (lots of Ukrainians) New England is not. So, I decided to make my own and see what happens. The big appeal is that you can make a bunch, and freeze them, and then quickly cook up whatever you need when you are alone and busy.
First, you make some dough. There are a bunch of ways to do this, but the recipe I decided on was:
2 cups flour
2 beaten eggs
1/2 tsp salt
1/3 cup water.
Knead it all together. Actually this was really sticky so I'd recommend adding extra flour befor you get your hands all gross.
Then let it sit for a bit while you make the filling.
Filling:
2 potatoes (I used Idaho types, which worked well)
1 onion (smallish)
1/2 cup cottage cheese
4 oz of cheddar
salt and pepper.
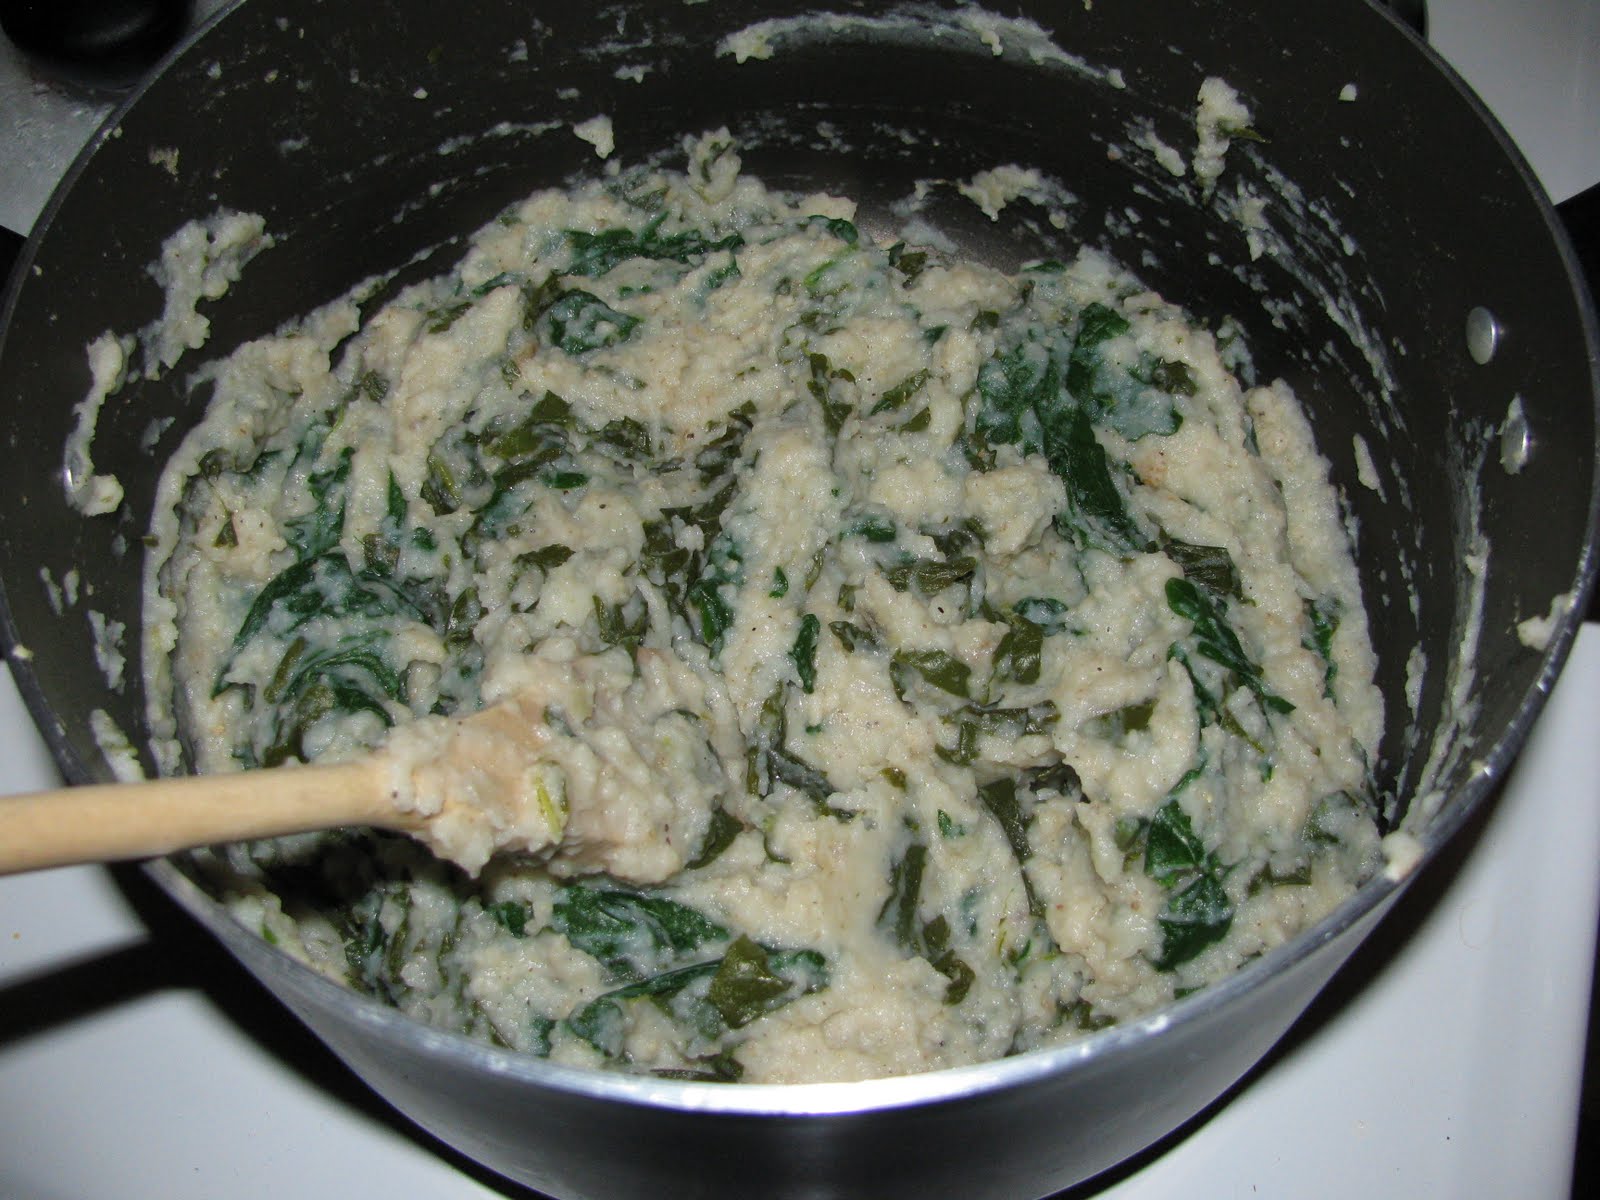
I mean actually you can put whatever you want in the filling; that's just what I happened to use and I would rate it "pretty delicious". Essentially you're making mashed potatoes; since I hadn't actually made those before that I can remember, I will remind you all what to do. Basically you peel the potatoes (I didn't have a peeler, just a paring knife, so I think I ended up cutting off a reasonable amount of potato as well) and chop them into chunks. Then you cover them with cold water, add salt, put a lid on partially, raise to a boil, and then simmer 25 minutes or so. By this point they should be really soft. Then you drain them and put back in the pot. Meanwhile, you chop the onion into little bits and sautee the heck out of it, and then when the potatoes are done you add the onion and the cheese and salt and pepper or whatever it is you're adding, and then you mash. I lack a masher, but since, as previously mentioned, the potatoes are really soft, you can basically squish them with a fork and a wooden spoon and make everything into a delicious creamy happy thing.

THEN you make the pierogies. In an ideal world, you would now roll out the dough (on a floured surface!) with a rolling pin. I lacked such a thing, so I sort of stretched it and squished it around with my hands. I'd really recommend rolling it though, because you want it as thin as you can get it. Then you cut it into rounds with your favourite round thing; or if you're me, you kind of cut it into squares and stretch it around some more. Then you take a spoonful of filling, put it on the square, and fold it up all around. Real pierogies are folded in half and pinched shut, but I kind of liked folding in the corners on four sides. As for the size--my first couple surprised me with their gigantitude. It turns out you really can't put more than about a tsp of filling in a pierogi if you want it to turn out sort of normal. As a result, I had too much potato filling left over. This is ok though, because it is delicious, as previously mentioned.

And now--congratulations, raw pierogi! At this point some of them should go on a baking sheet in the freezer, to be put in ziplocs when they are frozen (if you freeze them right away they'll stick to each other.) What you want to eat now should be boiled up (as above) or pan-fried, or both I guess.
THE VERDICT: Tastes pretty good. My only real problem was that I didn't make the dough thin enough, so the outsides were a little gluey; next time I will try to procure a rolling device to get them nice and thin. They are still very enjoyable and delicious, and now I can partake of food quickly because they freeze so well. The whole process did take a reasonable time investment, but it's compensated for by the time I will save later on with my easily-cooked-frozen-yummies.

Pierogies, folks!

No-cook pasta sauce

I am homeless/nomadic right now, so I don't have a lot of ingredients on hand. But I found an excellent recipe in Mark Bittman's How to Cook Everything (upon whose virtues I will wax poetic in a later post).

I am in general pretty unimpressed with pasta sauce in jars. It is too expensive to buy interesting ones, and I hate having the half empty jars in my refrigerator. This means that, whenever I make pasta, I need to make my own sauce. Today, I didn't want to make my own sauce. But pasta was essentially the only caloric foodstuff in my friend's kitchen (besides straight oil and chocolate).

The recipe that I found is as follows: mash up some fresh tomatoes with some cloves of garlic, add salt and fresh-ground pepper and fresh basil, remove the garlic from the sauce, put the sauce on pasta, then top with parmesan. I didn't have fresh basil (because my plant is elsewhere), but this still turned out to be pretty delicious. And it literally took 5 minutes to prepare.

Things I plan to buy (if my future kitchen doesn't have them):

-A basil plant
-A pepper grinder (and fresh pepper)
-A block of parmesan
-A grinder

My vision for this blog

Hello everyone!

There is a lot of information inside the internet about how to cook things. Like, seriously. But much of this information is written by Real People, with families and automobiles and decades of experience in the kitchen. That is, even if our time at Harvard hadn't destroyed our ability to communicate outside the bubble, much of the information would not be suited to our life situation. We, recent Harvard graduates, are all of a sudden living alone, making budgets, and trying not to get scurvy. We may even wish to feed people in order to bribe them into being our friends. I daresay that our situation is thus unprecedented and entirely unique. Hence, this blog.

Ideally, posts here would be about overcoming the challenges of cooking for one. Ideally, they would include pictures. I plan to post here whenever I am surprised by something I cook (which is pretty much every time I cook anything). On one hand, I hope we can find quick, easy, healthy, and delicious recipes for when we are pressed for time. On the other hand, I hope that we can inspire each other to be more ambitious in the kitchen when we aren't pressed for time. Of course, my vision isn't the only possible or valid one. If you want to be a contributor, just let me know!

Happy cooking!